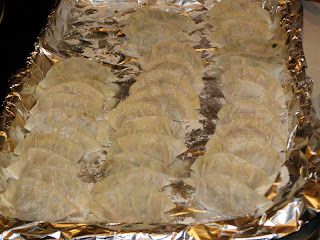
This is a very exciting thing for me, because those of you who know me are well aware that I could live on potstickers and nothing else for quite some time. They definitely fall into the "My Favorite Foods" column.
 |
| Here is our hostess, Yumi (Yumiko), sampling some of Mike's Blackberry Ale. |
 |
| Mixing the diced cabbage, featuring Seiko's hands. |
 |
| Oodles of ground pork. |
We added garlic to the ground pork, and chives.
 | |
| Seiko, chopping chives! |
 |
| Seiko is combining the cabbage with the pork mixture by hand, making sure to mix well. She is standing on a stool to do this because she is vertically challenged. |
 |
| The finished mixture looks like this! |
 |
| Gyoza Wrappers |
 |
| Close-up, so you can see the ingredients! |
In addition to your meat mixture and your gyoza wrappers, you need need a prep surface that has been lightly floured (we used trays covered in foil with flour), and a small bowl of water.
 |
| Yumiko, Tomoko, and me... making gyoza! |
You take a gyoza wrapper, floured side down, and put a spoonful of filling in the middle. Then wet your finger using your small bowl of water and run it along the edges of the wrapper. Fold the gyoza up and stick the edges together, crimping as you go.
Place the gyoza on the floured surface, making sure they do not touch, because they get sticky and will stick together.
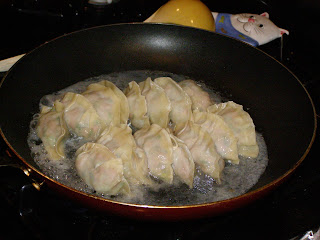
Then pan fry your gyoza. Start with a small amount of oil, to brown the bottoms. When the bottoms are brown, pour in a mixture of cornstarch and water, cover and steam until all the water is gone. The cornstarch acts to keep the wrapper crispy as it steams so it doesn't become soft.
 |
| All done! |
We enjoyed our gyoza feast with this amazing salad Yumi made, some miso soup, and some rice. The gyoza are very good with potsticker sauce mixed with sesame oil with chili. Oh yum!
 |
| From left to right: Yumiko, Mayumi, Tomoko, Seiko, and me. Thank you to Chana for snapping the photo! |
 |
| This is a dried sardine. See that eyeball? It was looking at me. |
 |
| So I ate it. |
Japanese Gyoza Ingredients:
Ground pork
Napa Cabbage
Chinese Cabbage
Salt
Chives
Garlic
Gyoza Wrappers


So I ate it! You have amazed me once again Miss Heidi
ReplyDeleteEwww a sardine!
ReplyDelete